
(For more reading, see Meghan's dress update experience, our first and second installments of wedding saga, and what we wore to each others' weddings.)
My husband and I have been together since we were 19, eight years, so the "when are you getting married?" question was not new to us. I knew we would be together forever and at some point there would be a wedding, but for some reason I was very superstitious about planning our wedding before we were actually engaged. The only things I knew before the moment he popped the question were that I wanted to get married outside, and I would be wearing my mother's dress.
My parents have been married for 38 amazing years, and I only hope my marriage will form into as strong and loving a partnership as my parents have. I'm a sucker for tradition and symbolism, and I could think of no better way to begin the next phase of my life than wearing the dress my mom wore to begin hers.
However, 1975 and 2013 are very different, and as a costume designer I couldn't help but want to put my personal touch on the dress. There were also several key physical differences between my mom when she wore the dress and me. My mom was 18 and 5'6" (not including the platforms she wore), with the narrow frame of a 70s era high schooler. I am 27 and 5'3" (and I wear flats), with the curvier frame of a 21st century woman.
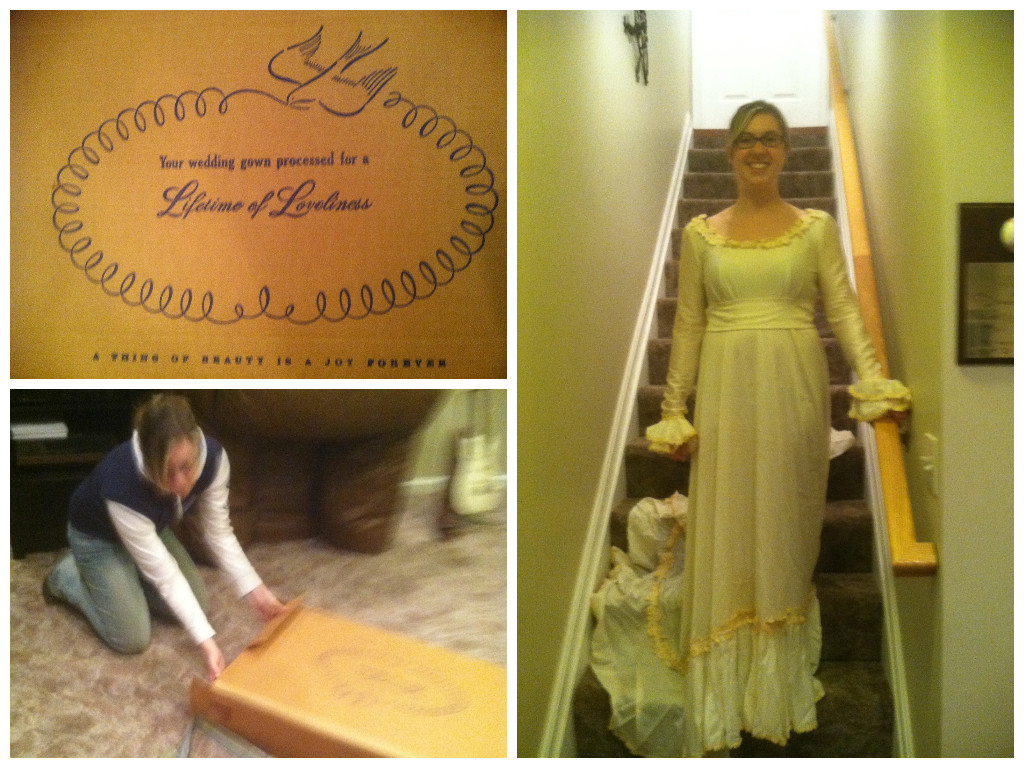 |
| Getting the dress out of the box for the first time |
I brought the dress into the Studio before I got it cleaned and we discussed some preliminary ideas. The sleeves definitely had to go, and we had to figure out a solution to my height problem. My dad and I both loved the cuffs of the sleeves, so I wanted to incorporate them somehow.
 |
| Sleeve option: 1 of 100,000 |
 |
| Marilyn's appraisal |

I have mentioned in the past that I missed my true calling as a Romantic era painting, and we knew the empire waist and scoop neck of this dress would be flattering. To go with that theme, we thought a ruffled cap sleeve would bring the look together.

 |
| Trying to figure out bustling |
 |
| What you can't see: gaping open back and 5" heels |
Then it was time to finally bite the bullet and actually take apart the dress. Multiple panic attacks later, the dress lay in 5 still recognizable pieces: the bodice, skirt, sash, and two sleeves.
 |
| Ready to walk down the aisle! |
 |
| Note Meghan in her reception dress in the background! |
 |
| And then I got way too excited and literally safety pinned it to my body |
Then the dress was ready to put back together. Though I approached the very first cuts of the dress as if I were to diffuse a bomb, the dress didn't explode and I had no regrets about my decision to shorten it.
 |
| excited! |
Once the dress was back in one piece, I began the long, long process of changing my mind every other day regarding the length of the dress, the gathering in the front, the sleeves, pretty much everything. As it turns out, I am the worst client ever.
When I cut the skirt down to make it high-low, the waistline became much too big around to have the smooth effect of my mother's dress. My first instinct was to gather it evenly all the way around.
 |
| Not quite perfect, but ok for now |
 |
| A matter of an inch makes a huge difference |
 |
| Calling in the expert |
The sleeves were a constant struggle. I had become obsessed with the idea of a dropped sleeve, but I seemed to be the only person who thought it was a good idea. This was a lesson in making the client happy, because even though I couldn't get anyone to agree with me in the beginning, I was ultimately happier because it was what I wanted.
 |
| With? Without? Higher? Lower? |
Then the subject of my skirt came up again. It was decided that the gathering was too much, so I decided to do a few large pleats on either side in the back. It smoothed out the front, and added a really beautiful line to the back.

 |
| New front |

And then I was done!!!

Just kidding. I changed my mind about sixteen more times after that. See in the above picture how the lace is all curled?
Some background: throughout this whole process of updating our wedding gowns together, Meghan and I would periodically hold up our half-finished dresses and say, "I really REALLY don't want to do this, but would it look better if I did?" And the other would almost always have to say, "Yes, I'm sorry, I am so sorry, but it would look better if you did that thing that is going to take five to ten hours of hand stitching/seam ripping/taking apart and putting back together." It was the exact gentle encouragement each of us needed to not let our stitcher selves convince our bride selves that we really didn't need to do the extra work. It is so much easier when the client is someone else!
So I slowly, sadly, held up my dress and asked Meghan, "Do I need to stabilize all this lace?" And she said, "Yes, I'm sorry, I am so sorry, but it would look better." So I stitched down all the lace on the collar by hand, and then I stitched down the ten feet of lace on the skirt. But it really did "finish" the look.

The sleeves were still bothering me, and a friend advised me to thin out the straps to show off the lace and give the top a more delicate look.

Then there was the issue of bustling. My train was fairly long so I needed multiple bustles to get the dress up off of the ground for the running around in the grass and dancing part of the night. I ultimately decided to attach five ribbons at different points in the back, that would tie to five ribbons at the same bustle point at the base of my corset. I stabilized it three or four times to keep the weight of the skirt from ripping the top during the reception. The style of bustling I chose is called a French bustle, or an under bustle, in which the folds of the dress are visible.
 |
| 1st: the back unbustled 2nd: trying out a French style bustle (though not the one I went with) 3rd: trying out an American style, or over bustle |
(Full disclosure: the following picture is of one of my amazing readers
and best friends holding my dress as I bustle it at my parents' house
about an hour before the ceremony rehearsal.)
 |
After taking apart and readjusting the front of the skirt one more time to mirror the pleats in the back ("Should I?" "I'm sorry, I'm so sorry..."), I was back to thinking about sleeves. I had a brilliant late night brainstorm and decided to widen the neck to a boat style neckline, and add the drop sleeve with only about an inch between the neck lace and the top of the cuff.
 |
After a veil/fascinator/nothing back-and-forth that reflected my dress process, I finally just bit the bullet, walked into the bridal shop nearest my house, and had a total "Say Yes to the Dress" moment.
Finally, finally, finally. My dress was ACTUALLY done!
 |
| Totally cried when I saw myself in the mirror. |
 |
| The sleeves, the lace, the skirt, the shoes, the veil, everything was perfect. |
Special thanks to Meghan, Marilyn, and my mom for their amazing guidance and patience, and to our AMAZING wedding photographer, Britt Croft of Britt Croft Photography, who was so great to work with and captured our day and my dress perfectly.


.jpeg)
.jpeg)

.jpeg)
.jpeg)